Monday, February 25, 2013

Square Foot Gardening

I recently purchased a book on Square Foot Gardening.  Square foot gardening is an alternative to planting in rows.  It consists of splitting the garden space into square-foot sections, where the plants are based on the area that they take up.

The gardens are designed so you can reach any part of the soil without stepping on the soil.  Stepping on the soil compacts it, with disturbs the soil structure.

Here are a few spacing diagrams that demonstrate the amount of garden area that each plant requires:


These boards are good for quick seed spacing in a square foot garden. 

There are many places on the internet that will provide spacing for square foot gardening.  If you can’t find a diagram for the plant you want to grow, look on the seed packet for the plant spacing:

3” = 16 plants per square foot
4” = 9 plants per square foot
6” = 4 plants per square foot
12” = 1 plant per square foot


On 2/18/2013, I added Detroit Dark Red Beets, Utah Yellow Sweet Spanish Onions, and Champion Radishes seeds in a square-foot pattern under my low tunnels.

Tuesday, February 19, 2013

How to Build a Low-Tunnel Self-Venting Door

 I built a vent door for the low  tunnel today!

The door frame was made from 4 2"x4" scraps and a 1/2" PVC pipe  from Home Depot. The door was made from 4 warped deck railing balusters and metal hardware to hold it together.  It was all inspired by my friend Brit's design.  The door opens using a auto-vent opener.  The auto-vent opener has a compressed gas cylinder that expands and opens the door when the temperature reaches a certain point.  Everything is covered in plastic dropcloth.


MATERIALS

Total cost of the project was about $100.  The biggest expenses are the auto-vent opener and the plastic film.

  • Two eight foot 2x4s (using treated lumber could create some concern about arsenic)
  • One eight foot 1x1 (square deck balusters work well for this)
  • 4 L brackets
  • 2 hinges
  • 1 autovent opener
  • plastic film (greenhouse film is more resistant to the degrading effects of UV light)


INSTRUCTIONS

1. Measure the base: I measured the width of my garden plot, making sure that a 1/2" PVC pipe bent into an arch could span the width of my garden.  I think I used a standard length of pipe (about 8 feet).  The pipe, when bent into an arch. I cut a 2x4 about 3" longer than the span that I measured, then drilled two very slightly sloping (near vertical) holes 1" diameter holes through each end of the 2x4.

2. Make the base for the frame: The holes slope in the direction of the end that they are closest to, which will accommodate for the arch in the PVC. I put each end of the PVC through the holes I drilled in the 2x4, leaving about 6" of each end of the pipe extending below the board.

3. Make the top support of the frame: Place another 2x4 about two thirds of the way up the PVC arch (on top of it) to measure the length of board that you need.  You will need to drill two, 1-inch holes at 45 degree angles, to accommodate the PVC, so measure the length of the board a few inches greater than the width of the arch.  It helps to start drilling the holes vertically, then adjusting the bit to roughly a 45 degree angle with the top face of the board. Once the holes are drilled, run the PVC through both sets of holes in the board.

4. Finish the door frame: Measure the distance between the top board and bottom board and cut two 2x4s to that measured length.  These will be the vertical parts of the frame for the door.  Screw and glue the parts together. 

5. Build the door: Use hardware to create a  squared door that will properly fit into the frame.  Attach the door to the frame with hinges.  Staple greenhouse plastic over the door and around the edges of the frame, making sure you do not restrict movement of the door with the plastic.


View of the inside of the low tunnel.  I transplanted the kale, spinach, and lettuce on 2/17/2013.   They are planted in a square-foot-garden configuration.

Spinach, kale, and lettuce seedlings growing in the low tunnel.  There is snow on the outside of the plastic.


ADDITIONAL INFORMATION


Saturday, February 16, 2013

Converting a garage into a garden!

As mentioned in the last post, my wife and I bought a new house, and it now has garden space!  When I bought the house, there was an old garage.  I have to apologize in advance that this is a tangent from gardening, but I will try to keep some garden information in here.


Because my home loan was FHA, I had to tear down my garage, which HUD considered a hazard. 


Here is the garage from the side.  It looked pretty rough and had a lean.


A subcontractor for Archstone Group did a great job tearing down our garage.  After tearing down the garage, he broke up the garage pad (foundation) and left the pieces in place.  The concrete chunks averaged about 8 inches thick and about 2 feet by 2 feet in size.  I broke the chunks up into smaller chunks with a large sledgehammer, then moved them out of the area of the old garage.

I built a fence across the driveway to enclose the backyard.  Note the chunks of concrete in the background.


On the remaining pad, the contractor built a lifetime shed, to store garden utensils and bikes.

The finished fence, with the shed hiding behind it.

After removing all of the concrete block chunks, I piled them up in the corner of my yard.  I then sifted the dirt under the old pad with a sifter made out of an old frame and chicken wire.  I used the gravel I sifted out as the base for a path in the middle of my new garden.  I made the path of concrete chunks.  The job was made a lot easier by a couple wheelbarrow gifted to me by my friends, Brandon and Byron.
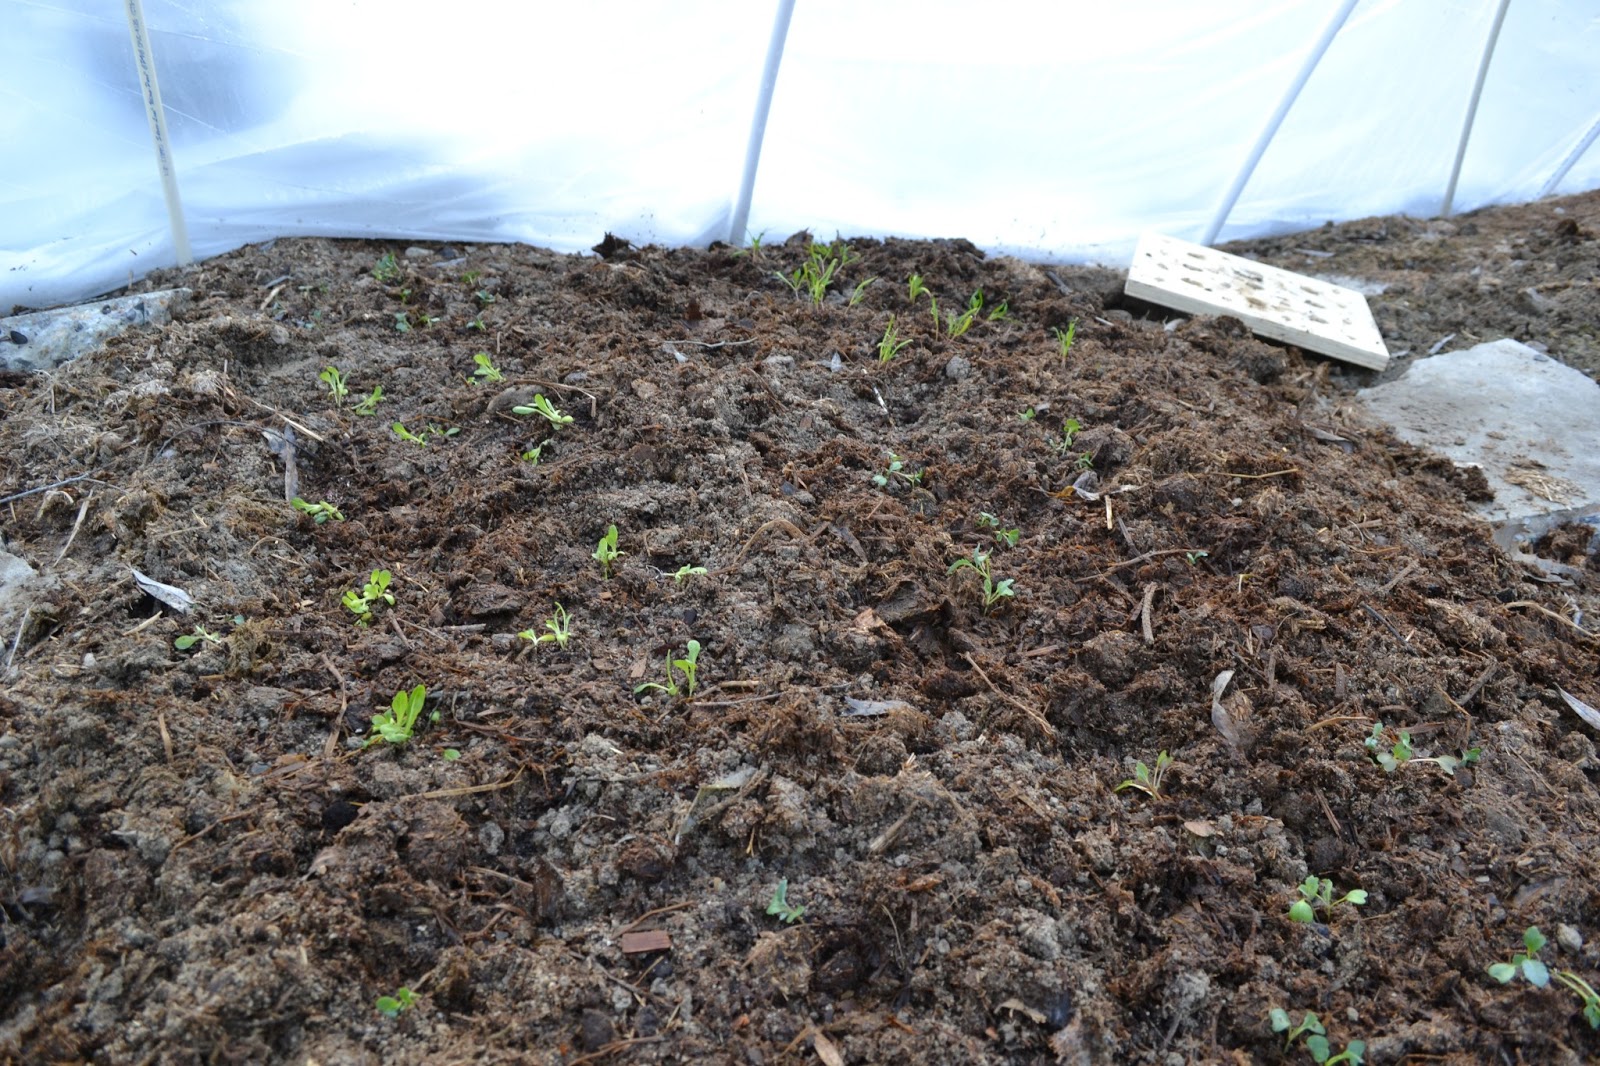
The finished garden

I filled in the garden with horse manure from the Salt Lake City Carriage for Hire and tilled the manure with the sifted soil from under the pad.  I borrowed the electric tiller from my good friend, Brit.  I gave her one of my gifted wheelbarrows as a way of saying "thanks" for her help.

The middle path is edged with pavers that I found in on the side of the garage.  The side paths are just chunks of foundation plunked down on top of the manure.

iI found an old piece of fence next to the garage that I converted into a trellis.

So far, I have already planted a ton of garlic and chives in the garden before winter hit.  Hopefully, it will show up in the spring.

Sunday, February 10, 2013

Getting an Early Start

COOL SEASON CROPS

Time to get some cool season crops growing!  Cool season crops can handle light frosts and low temperatures, especially if you use a hoop house or similar structure.  However, most cool season crops cannot handle high temperatures.

The following crops, according to ISU, are good cool season crops:
Broccoli 
Cabbage 
Cauliflower 
Chinese Cabbage   
Kale 
Kohlrabi 
Lettuce 
Mustard Greens 
Peas 
Radishes 
Rutabagas 
Spinach 
Turnips 


STARTING PLANTS INDOORS

You can start most of the plants listed above indoors to help get an early start.  Root vegetables are usually better to sow directly, but I have known people to have success with everything indoors.


DigginFood has some good lists on plants that are good to sow versus plants that better planted as starts.  This website and this website also have pretty good discussions about planting seeds and planting starts.

I have started my leafy greens indoors:

Lettuce seedlings!  My friend and personal extension agent, Brit, recommended I thin the seedlings down to two or three plants per spot.

Spinach seedlings.  Some of them already have true leaves.

The kale seedlings are not germinating very well.  I think there will be enough to plant and harvest.

The Urban Organic Gardener says its better not to start the following indoors:

Beens
Beets
Carrots
Dill
Garlic
Onions
Peas
Radishes


WARM UP YOUR SOIL

Cover your soil with a hoop house, greenhouse, or layer of plastic to get it warm and ready for your plants or seeds.

Here are some extremely good instructions on how to make a small garden tunnel.


PLANTING UNDER COVER

Cool season crops, like spinach, still need reasonable temperatures to grow.  Here is a great picture from an excellent USU publication.  

It basically says spinach does best at 67 degrees F and can live between 36 and 84 degrees F.  Spinach grown above 75 degrees will have a bitter flavor. Early in the season, a crop cover, like a low tunnel can help you keep your early season crop in that optimum range.

This figure, from the same publication, shows that a low tunnel can add make the air temperature up to 20 degrees F warmer.

I put up my low tunnel last week.  All of the snow under it has melted and the soil is thawed.  As soon as my baby plants grow a little more, I will thin them out and harden them off, then replant them.


WHEN TO PUT THE STARTS/SEEDS IN THE GROUND

Salt Lake City, Utah average temperatures
Average temperatures for Salt Lake City from www.city-data.com. This year temperatures a re lower than shown on this chart.

Frost dates for Salt Lake City area from http://climate.usurf.usu.edu/reports/freezeDates.php

Station Name
Last spring freeze
First fall freeze
Freeze-free
Period
Years
Early
Avg
Median
Late
Early
Avg
Median
Late
Short
Avg
Median
Long
19-Mar
13-Apr
13-Apr
02-May
11-Oct
31-Oct
31-Oct
21-Nov
175
202.7
204.5
233
1928-1954
26
31-Mar
27-Apr
29-Apr
13-May
18-Sep
18-Oct
22-Oct
03-Nov
139
173.6
173.5
216
1990-2005
10
11-Mar
25-Apr
26-Apr
28-May
17-Sep
18-Oct
19-Oct
14-Nov
125
177.3
179.5
237
1948-2012
64
20-Apr
05-May
04-May
18-May
15-Sep
04-Oct
06-Oct
25-Oct
127
151.3
155.0
176
1967-1978
9
16-Feb
08-Apr
19-Apr
01-May
27-Oct
06-Nov
05-Nov
21-Nov
182
212.0
204.0
261
1985-2012
8


Saturday, February 2, 2013

Starting Seeds

I started some seeds!  

I built a shelf last night (1/26/2013) in the basement next to the water heater and furnace to start seeds.  I put the shelf next to the appliances, because it is a warm area, which should help the seeds germinate.

I found a Burpee seed starting kit at Savers for $2.99.  It came with a self watering mat and a clear plastic cover.

Today (1/27/2013) I planted three rows of lettuce, four rows of kale, and five rows o f spinach (from left to right).

The automatic watering mat in action.


This picture was taken on 1/31/2012.  The lettuce (top) has grown the most.

This picture was taken on 1/31/2012.The spinach (foreground) is starting to pop up.

A time lapse of some container basil growing.