We are a husband and wife team, Utah transplants from Indiana, and first time parents. Follow our journey to grow and use food and flowers on our little slice of paradise on the Jordan River in Salt Lake City.
I did this last year, but I planted tomato plants outside already! I am not sure they will survive, and I am not in a hurry to have tomatoes, but I like pushing the limits and making mistakes.
To protect the tomatoes from frost, I surrounded them with a wall of water. I transplanted two of my fig tomato seedlings into a 7 gallon container on the south side of my house.
Looks opimistic.
History of temperatures from the past 20 years indicate that temperatures should stay above the mid 20s.
When we bought the house, there were grapevines all over the fence. Upon closer inspection, we found that the vines were attempting to overtake the apricot tree and the fence. Note all of the green on top of the fence. We also found vines climbing up a utility wire that led to our neighbor's garage. Unfortunately, I did not have the foresight to take a "before" picture, so you will just have to make due with this blown-up cell phone picture.
After pruning back the grapevine to four main runners, I constructed a trellis using 6-foot garden support poles and galvanized steel wire. I put turnbuckles in the wire to keep it taught. Because we only pounded the poles into the ground, we added supporting guy wires attached to our large cherry tree (in background of photo) and a power pole (out of picture to the left of the photographer).
We tried to prune the vine to match the head-trained variation of grape vine pruning. However, the video below might suggest that we should have left more pieces of runners coming out of the vine.
We had a total of three steel wires going parallel to the fence, strung across the pounded in poles. I also plan to grow berries on the far end (near the power pole). If they are very long, then the wires should be loosened in the winter, because they shrink and will be dangerously tight.
We made a wreath with the scraps of grapevine that we pruned!
Once our grapes grow, we can mash them up and make juice for fermentation!
Today I started some seeds in my little basement grow station area.
I planted Marketmore Cucumbers, Sibley Squash (C maxima), Super Sugar Snap Peas (Pisum sativum), Red Fig Tomatoes, Pickling Cucumbers (Wisconsin SMR), Jalapeno Peppers, and Long Red Cayenne Peppers.
As a geologist, I was forced to learn about soil and soil description, though I didn't necessarily retain that information. Based on what I have heard from friends, the important aspects of soil are the soil structure and soil chemistry.
SOIL STRUCTURE
Soil structure is key for proper root growth, water drainage, and moisture retention. Most gardeners will tell you never to step on the soil, as it compacts it and destroys the soil structure. Organic material generally helps improve soil structure. The USDA has a good help sheet for evaluating soil structure.
Different soil structures from the Colorado Master Gardener program. The structures are arranged from left to right in order of how quickly they drain water.
SOIL TESTING
One concern that a gardener might have is that their soil chemistry is not right for the type of plants growing. Different plants like different ratios of nutrients and different soil pH.
To determine the current condition of your soil, you should have it tested by your local extension agent. They usually provide results, interpretations, and recommendations for a reasonable fee. The USU Extension office offers an excellent soil testing service, which is open to the public. It is key to get a representative sample when taking soil samples to the extension agent.
My concern with all of the horse manure is burning my plants with excessive nutrients. I found some information on this on eHow. Based on what I have read, as long as the horse manure isn't fresh and has had time to compost, it shouldn't "burn" the plants.
PREPARING YOUR SOIL
Most of the garden books I have read recommend a process known as double digging to prepare soil for cultivation. This process requires digging up a small section of the land (3x1x1 foot block), then loosening the soil under that block with a pitchfork, then digging up the adjacent block of soil and moving it to the the hole from the last spot you dug. When preparing the soil below the old garage foundation, I double dug, and sifted the soil.
BIOTA IN SOIL
Soil is an ecosystem, supporting a variety of organisms, including our plants. Ensuring that the soil is vibrant with life could help with vegetable production. Root nodules in some plants indicate a symbiotic relationship between plant roots and a bacteria (rhiazobia). Amazingly enough, you can buy rhiazobia.
I recently purchased a book on Square Foot Gardening. Square foot gardening is an alternative to planting in rows. It consists of splitting the garden space into square-foot sections, where the plants are based on the area that they take up.
The gardens are designed so you can reach any part of the soil without stepping on the soil. Stepping on the soil compacts it, with disturbs the soil structure.
Here are a few spacing diagrams that demonstrate the amount of garden area that each plant requires:
These boards are good for quick seed spacing in a square foot garden.
There are many places on the internet that will provide spacing for square foot gardening. If you can’t find a diagram for the plant you want to grow, look on the seed packet for the plant spacing:
On 2/18/2013, I added Detroit Dark Red Beets, Utah Yellow Sweet Spanish Onions, and Champion Radishes seeds in a square-foot pattern under my low tunnels.
The door frame was made from 4 2"x4" scraps and a 1/2" PVC pipe from Home Depot. The door was made from 4 warped deck railing balusters and metal hardware to hold it together. It was all inspired by my friend Brit's design. The door opens using a auto-vent opener. The auto-vent opener has a compressed gas cylinder that expands and opens the door when the temperature reaches a certain point. Everything is covered in plastic dropcloth.
MATERIALS
Total cost of the project was about $100. The biggest expenses are the auto-vent opener and the plastic film.
Two eight foot 2x4s (using treated lumber could create some concern about arsenic)
One eight foot 1x1 (square deck balusters work well for this)
plastic film (greenhouse film is more resistant to the degrading effects of UV light)
INSTRUCTIONS
1. Measure the base: I measured the width of my garden plot, making sure that a 1/2" PVC pipe bent into an arch could span the width of my garden. I think I used a standard length of pipe (about 8 feet). The pipe, when bent into an arch. I cut a 2x4 about 3" longer than the span that I measured, then drilled two very slightly sloping (near vertical) holes 1" diameter holes through each end of the 2x4.
2. Make the base for the frame:The holes slope in the direction of the end that they are closest to, which will accommodate for the arch in the PVC. I put each end of the PVC through the holes I drilled in the 2x4, leaving about 6" of each end of the pipe extending below the board.
3. Make the top support of the frame: Place another 2x4 about two thirds of the way up the PVC arch (on top of it) to measure the length of board that you need. You will need to drill two, 1-inch holes at 45 degree angles, to accommodate the PVC, so measure the length of the board a few inches greater than the width of the arch. It helps to start drilling the holes vertically, then adjusting the bit to roughly a 45 degree angle with the top face of the board. Once the holes are drilled, run the PVC through both sets of holes in the board.
4. Finish the door frame: Measure the distance between the top board and bottom board and cut two 2x4s to that measured length. These will be the vertical parts of the frame for the door. Screw and glue the parts together.
5. Build the door: Use hardware to create a squared door that will properly fit into the frame. Attach the door to the frame with hinges. Staple greenhouse plastic over the door and around the edges of the frame, making sure you do not restrict movement of the door with the plastic.
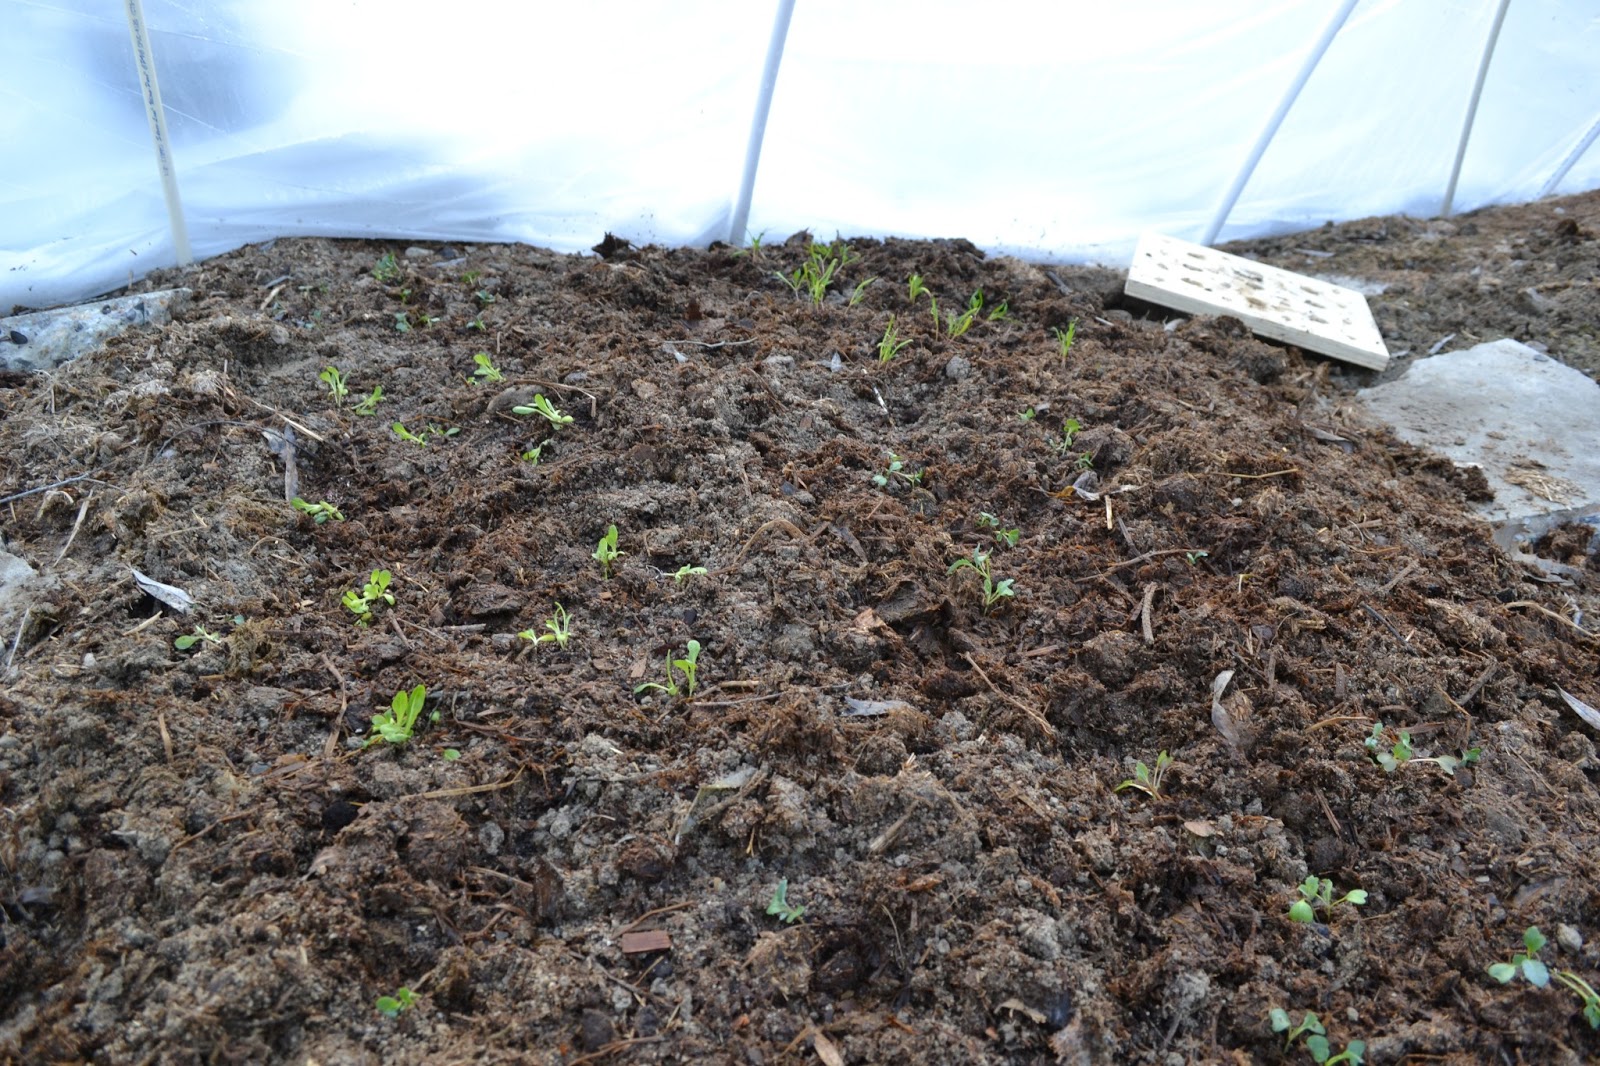
View of the inside of the low tunnel. I transplanted the kale, spinach, and lettuce on 2/17/2013. They are planted in a square-foot-garden configuration.
Spinach, kale, and lettuce seedlings growing in the low tunnel. There is snow on the outside of the plastic.