This is our small harvest of beautiful strawberries and radishes on the last day of May 2014. The strawberries we've been growing are the most delicious I've ever eaten. They are the ones in the hanging baskets that can be purchased at a local hardware store.
We are a husband and wife team, Utah transplants from Indiana, and first time parents. Follow our journey to grow and use food and flowers on our little slice of paradise on the Jordan River in Salt Lake City.
Saturday, May 31, 2014
Saturday, April 19, 2014
Growing Vertically
I am very interested in making the most of my space for my garden. While one option is to get rid of most of my lawn, which I do plan to do one day, I am currently courting less drastic options. Vertical growing is an excellent way to maximize use of space. There are many different ways that plants can use their plant parts to climb.
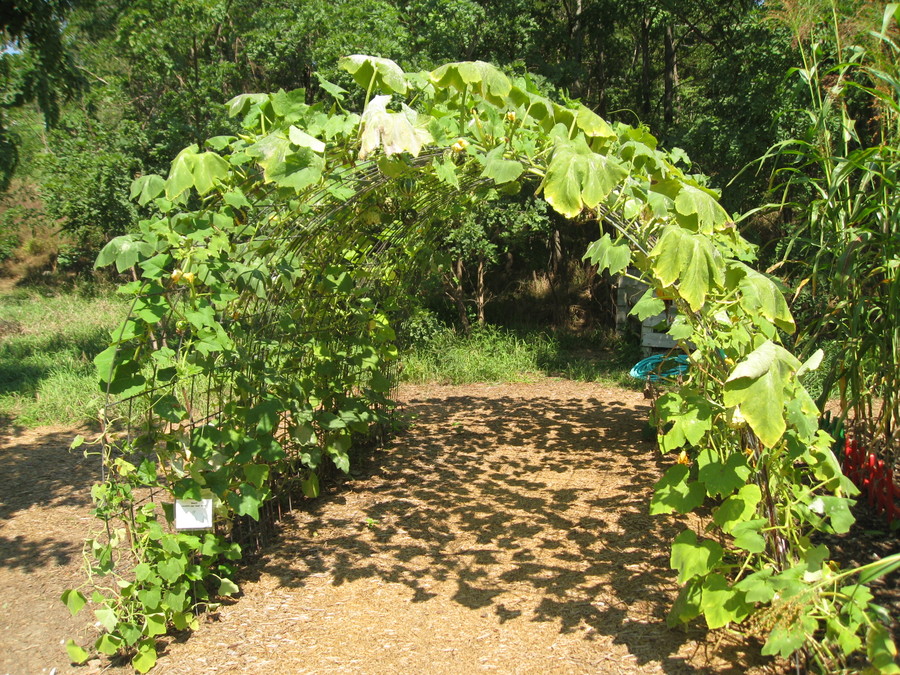
I am excited to apply vertical gardening to my squash plants this year, as they tend to sprawl out and dominate my garden. Sunset and others suggests using an arched or slanted trellis to grow squash and melons, because the trellis will allow for good air circulation, reducing mildew and keeping the squash from rotting. Some heavy dangling fruits require support like nylon slings to keep the fruit attached to the plant.
Last year, we had a lot of trouble with the tomatoes being unruly and taking over the garden. We were using the Ultomato tomato supports last year with limited success. I might try a different method this year so my garden will be more orderly.
This website has many excellent budget trellis designs.
I am excited to apply vertical gardening to my squash plants this year, as they tend to sprawl out and dominate my garden. Sunset and others suggests using an arched or slanted trellis to grow squash and melons, because the trellis will allow for good air circulation, reducing mildew and keeping the squash from rotting. Some heavy dangling fruits require support like nylon slings to keep the fruit attached to the plant.
| Picture of an arched squash trellis from computer programmer Jeff Epler's blog (http://emergent.unpythonic.net/) |
![]() |
| A melon sling made using pantyhose from the Will Seed for Food blog. |
| A "cattle panel" fence piece used to create a slanted trellis for squash. This is the design that I will likely go with for my garden. This image is from the Trellis-netting company, which sells different types of vertical garden supports. Gardener's Supply also sells this item. |
| We also plan on growing my cucumbers vertically. I think we will use our fence trellis (pictured) to do this. Veggie Gardener has great instructions on how to build a cucumber trellis. |
| This year, we are going to try to use "poles" to support our pole beans. We planted two bean plants for each pole. As they grow, we plan to wrap them around each pole. |
| Here are the little bean plants near each pole. |
| Here is an expanded view of one of our two pea containers. |
Last year, we had a lot of trouble with the tomatoes being unruly and taking over the garden. We were using the Ultomato tomato supports last year with limited success. I might try a different method this year so my garden will be more orderly.
| The Florida weave is a popular way to support tomatoes, as it is cost and time effective. This is how Wasatch Community Gardens supports most of their tomatoes. This image is from an excellent article on tomato support by the Vegetable Gardener. |
| This photo is from Rick's Roots, where he describes a technique of using a weighted string to train tomatoes, while eliminating tomato suckers. The Plant and Plate blog has some good directions for string training tomatoes. |
This website has many excellent budget trellis designs.
Sunday, April 6, 2014
Friend's Garden
We recently visited our good friend, Brandon, and was inspired by his massive garden. He showed us a ton of seedling peppers, among other baby vegetable plants. He was nice enough to give me permission to show off his awesome plot on my blog!
![]() |
| Using a borrowed tiller and stakes and string, Brandon made neat long rows with furrows in between. He is lucky enough to be renting a house with water rights. He uses the furrows for flood irrigation. |
![]() |
| The windows in the foreground are cold frames - mini greenhouses used to harden off plants and start plants early. You can learn to build these from the sustain life website, This Old House, or organicgardening.com. The mounds in the background are for melons. They are surrounded by burlap coffee sacks, to keep the melons off the ground and to provide mulch. |
Brandon is using mounds to plant his melons. Each mound has plenty of space around it, as melons like to spread out. Melon plants like intensive watering, but they do not like to hang out in soggy soil. Melon mounds allow for good drainage. Based on the helpful gardener forum, melon mounds stem back from farmers using compost heaps as a place to grow melons. They also allow for one to plant seeds deeply for good germination and root development.
![]() |
| A frame for a greenhouse. I forgot to ask Brandon what he was planning for this. |
![]() |
| A very nice compost bin. To build the bin, Brandon stood five pallets on end (tall dimension is vertical) and held them together with long boards, including one on top for extra support. The light brown material in the second bin is coffee chaff. This Ehow article says chaff contributes nitrogen to garden soil and it can be used as a mulch. I have tried using it as a mulch and find that straw works better. The barismo blog has excellent information on chaff! |
We always enjoy visiting our friend Brandon. Hopefully, we can give y'all an update on his huge garden this season.
Sunday, March 30, 2014
Mini drip irrigation system for less than $40
Using pieces left over from my massive irrigation project, I built a mini drip irrigation system for my potted plants on the south side of my house.
| I used a hose splitter (grey and yellow thing) so I could continue using my hose on my spigot. On the second hose bib, I attached an Orbit hose timer. This timer is pretty intuitive and is dependable. They are generally about $30. |
| From that piece of tubing, I ran four smaller drip tubes. |
| At the end of each drip tube, I put an adjustable drip sprayer. |
Saturday, March 22, 2014
Irrigation System
Last summer, we installed an irrigation system for our grass and garden.
| Before we installed the system, we were using a series of hoses, splitters, and sprinklers. |
The first thing we did was make a plan of what we wanted in an irrigation system - what needed watering. I wanted another hose attachment, a drip irrigation system for my garden, and to water my weeds (aka a lawn).
The next logical thing I should have done was to test the pressure and flow of my plumbing system. The pressure and flow of my plumbing system ultimately dictates how many sprinkler heads I can have on at the same time. Each set of sprinkler heads is controlled by an electronic valve that is wired to a fancy timer.
Here are a few good sites for planning a sprinkler system:
http://www.sprinklerwarehouse.com/DIY-Determine-Pressure-and-Flow-s/6671.htm
http://www.dummies.com/how-to/content/planning-your-lawn-irrigation-system.html
http://orbit.homedepot.com/sprinkler_design
I had the advantage of already having a pipe going out of my basement to an existing set of sprinklers in my front yard. Whoever lived in my house before me took EVERYTHING when they moved out, including all of the sprinkler heads for my front yard. The existing setup also lacked two important things: a backflow preventer, to stop water in the irrigation pipes from flowing back into my system, and an automatic valve, so that I do not have to turn the water on and off manually.
| A view of my main water line and the irrigation connection (where the green-handled valve is). The installer of the irrigation system had the foresight to install a drain on the irrigation line. |
| I left a space for a backflow preventer. |
One of my drip heads (a filter, pressure regulator, and adapter) and my extra spigot.
| One of the smaller drip lines goes to a hanging basket. Unfortunately, I set up the drip line too late for the flowers that were in there. |
| All of the boxes and sprinkler heads are connected by a series of underground PVC pipes. To get these pipes underground, I rented a trencher from Home Depot. I bought thicker pipes to make my effort worthwhile. I strongly advise anyone who is planning on using a trencher to call 811 first (at least a couple weeks in advance). I also laid wire to control the electronic valves in these trenches. |
| That wire leads to an irrigation control timer, which can be set to turn on the different valves at different times. |
| A schematic of my resulting irrigation system. |
- Make liberal use of quick disconnect PVC connectors to make valve maintenance easier. They add bulk to the valve box, but they are really handy when working on an irrigation system.
- Always leave room for expansion in your valve box, valve assembly, and on your timer system. Bury extra valve cable when you install your lines so you don't have to dig new trenches to add valves.
- When trenching for sprinkler lines, make best use of the trencher by also trenching drainage lines, so that your yard can drain effectively. Create a deeper trench in the downhill direction of your yard to increase the gradient of flow.
- Use flexible risers that come off of the side of the main pipe. If you hit your sprinkler head on a non-flexible riser, you could snap your sprinkler line.
- Give yourself a little extra room with your flexible riser pipe so you can accommodate for settling and ground movement.
- Install self-draining valves for each zone, so that most of the water leaves the pipes after the zone is done being used.
Friday, March 14, 2014
Raised Beds
I apologize for the lapse in posts since May of last year. I have been preoccupied with a (formerly) pregnant wife and new baby boy (Fox)!
I mounted 3"-long 1"-diameter PVC pieces to the corners and middle of the top frame so that I can insert curved PVC pipes for a cold frame.
This return post will be about the new raised garden box I just built. Last season, I noticed that some of the plants may have been suffering from poor drainage, and that many of the areas in my garden plot were hard to reach.
To fix the accessibility and drainage issues, I decided to start adding raised beds to my plot. I wanted something modular that I could add to the garden piece-wise, so I didn't have to invest a huge amount of money at one time.
Based on my design requirements, I built rectangular frames out of 2 2"x6"x10' redwood boards. I used steel corner brackets to make the frames have orthogonal corners (properly square). So far, I have built two frames and stacked them. I used scrap redwood to hold the two frames together, and wooden stakes to hold the frames in place on the ground. I did not put a barrier between the box and the soil below it.
![]() |
| The plastic sheeting is used as a cover for the cold frame. Eventually I will add the automatically opening door I built in a previous post. |
I put 6 cubic feet of organic garden soil from Home Depot in the box, which filled it about 1/3 of the way full.
In the box, we planted 1 row of cabbage (Golden Acre), 2 rows of beets, and 2 rows of radishes (Champion). The seeds are from a variety of sources, mostly obtained from the annual Salt Lake City seed swap.
![]() |
| The small packet of beets is Early Blood Turnip Beets, distributed by Slow Food Utah. I am especially excited about them. |
Thursday, May 16, 2013
Flowers and Companions
A couple of my vegetables are flowering. I also bought my wife some flowers for Mother's day, as this is her first Mother's day, and I think that flowers are very representative of fertility and reproduction.
| Here is a hanging flow basket of purple flowers that I bought Brooke for Mother's day. I don't remember their names. |
| Some of the flowers we planted were French Marigolds. They are good companion plants with tomatoes, as they attract pollinators and are supposed to repel some pests. |
| Here is our Siberian Tomato plant with its companion French Marigold. |
| More Marigolds! |
| Our beautiful Borage continues to bloom. Borage is another excellent companion for tomatoes. It also works well with squash. Borage attracts bees and predatory wasps and repel moths. |
| Our pea plants are growing tall, but the coolest thing going on with them is that they have... |
| flowers!!! They are also growing little pea pods. |
| We have Periwinkle plants creeping in from the neighbor's yard. It is everywhere. It is very invasive and is growing rapidly. |
| The blackberry bare roots are almost done blooming. |
| The cherry trees no longer have flowers, but they do have little fruits! |
| Here are some white flowers that I think are white garlic growing in the corner of my yard. |
| We have a single apricot. |
| Some baby apples. |
| Some blossoms from the neighbor's tree. Does anyone know what type of tree this is? |
OTHER GARDEN NEWS
| Our grape vines are growing fast. |
| We harvested some radishes!!! Brooke says they were super spicy. |
| Our tomatoes are not flowering yet, but they are growing fast. These are my fig tomatoes. |
| I made a trellis for my cucumber plants. |
| Within 15 minutes of putting in the trellis, the cucumbers started grasping on. |
COMPANIONS
Companion planting is an excellent way of diversifying a garden, to help prevent it from being prone to being wiped out by pests. I found a few good companion plant resources.
The Wiki on companion plants is awesome: http://en.wikipedia.org/wiki/List_of_companion_plants
| This is an excellent companion grid. |
Subscribe to:
Posts (Atom)